Thursday, October 2, 2014

MultiWindow on any android device (Toggle from Navigation Keys)

      Ever wanted to do MultiTasking with MultiScreen, to chat and watch Youtube video at the same time like the MultiWindow feature on Samsung and LG smartphones. Well then chill out as your Android Smartphone is surely capable of that feature too.


Things you'll need:


Lets Get started

  • Firstly install and activate Xposed Installer
  • Download the module XMultiWindow from Xposed, Install and activate it
  • Install MultiWindowSidebar
  • Now open MultiWindowSidebar and goto Select Apps tab to Set your desired apps on Sidebar
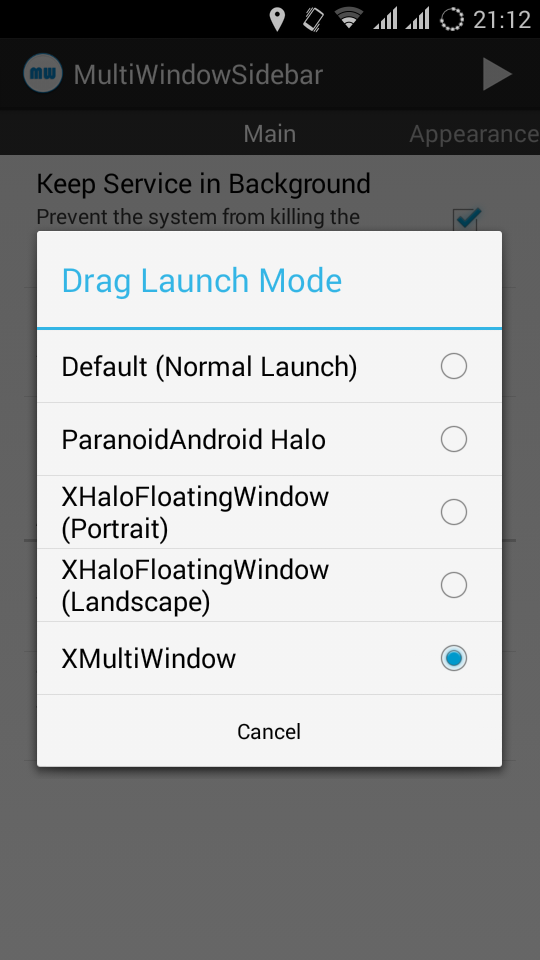
  • Now goto Drag Launch Mode and select XMultiWindow


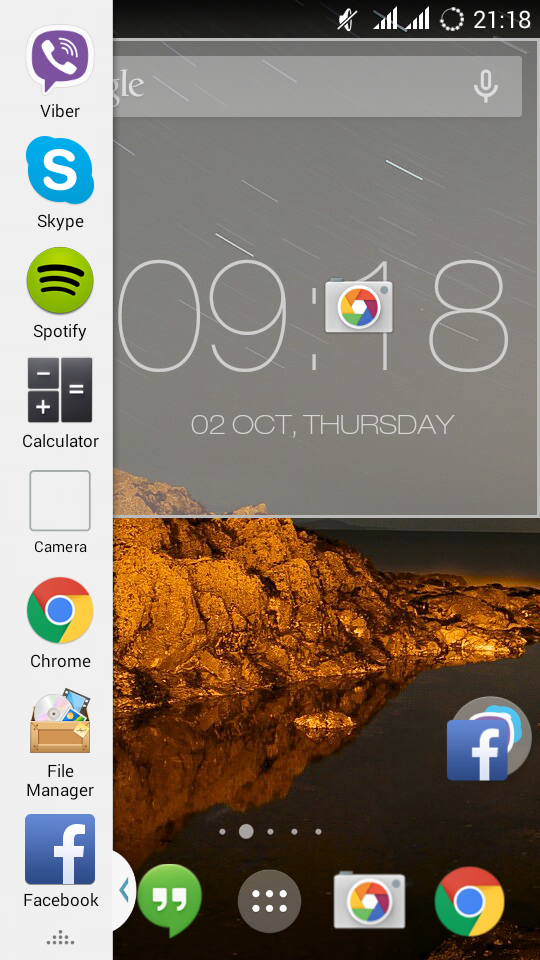
  • Well half of the tutorial is done by the way. Now just press the Play button to launch the Sidebar and give it a try by dragging the apps to the up and down part of the screen.


Activate the Sidebar from a press on Desired Navigation Keys

           Just like on Samsung Galaxy Devices you can set the Sidebar to be Activated from navigation bar. Gravity box and QuickShortcut maker must be installed for this trick to work
  • Open gravity box, Scroll down and goto Navgation keys action. There you'll see differenet options on setting the action on the way of pressing different navigation keys. You can set the toggle on any desired keys. 
  • Choose your desired Navigation key action and choose custom action >> then choose shortcut >> Activities. 


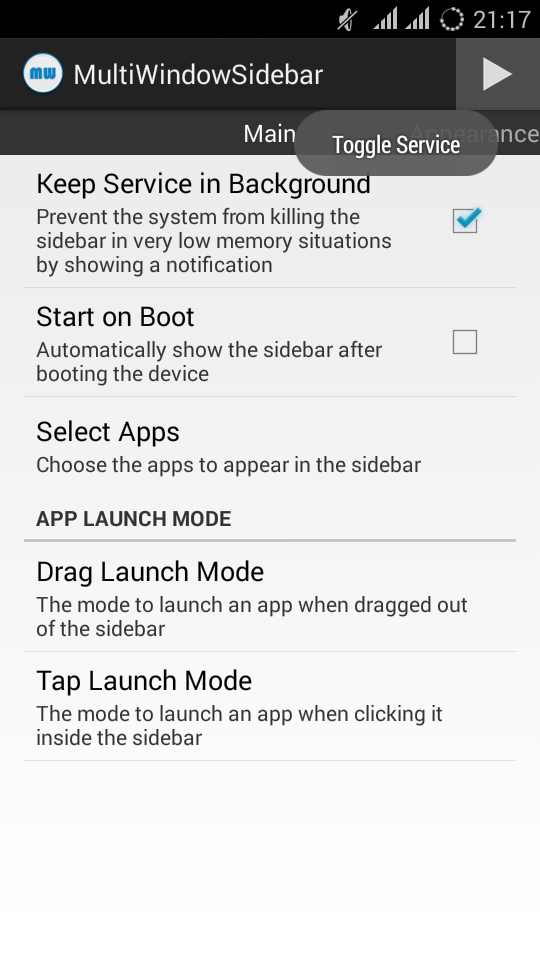
  • Search and tap MultiWindowSidebar and Choose Toggle MultiWindowSidebar from expanded option and Create. Now restart your device and you are all set.


  • Now try pressing the navigation key which you set and you will see movable Sidebar appearing on side of your screen. Just apply same process to make the sidebar Disappear.


Check Page Rank

Wednesday, October 1, 2014

Shrink Screen of any android device for one handed use from navigation keys

Having trouble trying to get all across the screen of your phone with one hand, well its the age of big screened smart phones and well you can't complain about it, oh! you need that by the way. Well need not to worry and thanks to a module 'One-Handed Mode' of Xposed. This is a module which can be used to shrink the whole screen of your device with a click. Well in this post i will teach you guys to actually link that toggle from one of your navigation button for ease access.

  • Firstly your android device must be rooted
  • Things you need: Xposed Installer, Quick Shortcut maker, One Hand mode module.
  • Install Quick Shortcut Maker from playstore and Install Xposed Installer. You can download it from here.
  • Open xposed > goto framework and press install/update and reboot your device.
  • now again open xposed and goto download tab and search for One-Handed Mode and download and install it. After installation of the module activate it from Module tab on xposed.
  • Like wise install gravity box with same process as one-handed module.
  • Activate both gravity box and one- handed module and restart your device.


  • Now open OneHand Mode from app menu, and you can make your desired settings from setting for apps and settings for notification centre tabs.


  • After you've finished playing around the setting of One-Handed mode, Here's the interesting part. Now I'll teach you to toggle the shrink screen by pressing one of your navigation button, Let us set that on Long press of Home button.
  • Now for this part open gravity box
  • Scroll down and goto Navgation keys action. There you'll see differenet options on setting the action on the way of pressing different navigation keys. You can set the toggle on any desired keys. 
  • Choose your desired Navigation key action and choose custom action >> then choose shortcut >> Activities. 


  • Search and tap One Hand Mode and Choose One Hand toggle from expanded option and Create. And you are all set


  • Now try Long pressing your home button and you will see the result of Shrink of your screen best for the one handed use.

Wednesday, July 30, 2014

How to Enable Google Now In Nepal

1.   Turn on Developer Options: 
      Settings > About Phone > tap 'Build Number' several times until you are notified that you are a developer

2.   Allow Mock Locations: 
      Settings > Developer Options > check 'Allow mock locations'

3.   Download and install 'Fake GPS location' from playstore.

4.   Set a fake location to somewhere where Google Now is               enabled (e.g. North America): 
      open 'Fake GPS' > click on the search button > type the location > click OK > click 'Set location'

5.   Disable Google Play Services: 
      Settings > Apps > All > Google Play Services > Disable

6.   Disconnect your google account: 
      Settings > Google (under the subtitle 'ACCOUNTS') > Search > Accounts & Privacy > Google Account > Sign out

7.   Re-connect your account: 
      Settings > Google (under the subtitle 'ACCOUNTS') > Search > Accounts & Privacy >           Google Account > click on your email address

8.   Now accept Google Now.

9.   Enable and update Google Play Services: 
      Settings > Apps > Disabled > Google Play Services > Enable

10. Now, you can stop fake GPS: 
      open 'Fake GPS' > click 'Stop'

11. Uninstall 'Fake GPS'.

12. Restart Your Device
Check Page Rank

Friday, July 11, 2014

Android Lollipop Keyboard

Developer version of Android lollipop keyboard which was released by some developer on Google play store. But because of some copy right issues Google removed it from the play store. Luckily I had downloaded the keyboard from the play store. So Here is the link to my drive from where you can download the apk file of Android L keyboard

Friday, May 23, 2014

Tuesday, December 11, 2012

Trick on How to uninstall the deepfreeze when you have forgot the password or the program isn’t responding.


Normally In order to uninstall the program deep freeze you need to thaw it, but unfortunately sometimes you may forget the password or the program may stop responding (it happened in my case). So you may make a decision to reformat you computer which is a total mess work. So here I have one working trick which I had also found on some sites and it is 100 % working. For this process you don’t need any kinds of software like the Deep freeze unfreezer. But as you may know that to uninstall the deep freezer you need the backup software of the deep freezer which you had used to install the deep freeze.
                So I am giving the step by step for the procedure:
·         First thing you need is the deep freezer installer. So back it up J
·         Remember to be a bit faster or it may not work.
·         First step is to restart your pc and go to the BIOS mode by pressing F2 or del key depending on your computer.
·         Then you need to change the date of your computer from bios to 4 years earlier i.e. 2008 or before that. Note that this is the most important step for the process to work. Date must be change to before 4 years because before 4 years there was no deep freezer. He He
·         Simply save and restart your pc.
·         Again press F8 to select the boot option and select Windows Debugging Mode.
·         Now when the welcome screen appears be ready to press ctrl+Alt+Del to go to task manager.
·         After going to task manager go to process tab and there you can find DFServ.exe, so you have to kill the process.
·         If it succeeds then you are done. Restart your computer again.
·         Go to BIOS and again change the date to normal, Save and reboot.
·         Then when you are at desktop you will find the deep freeze icon on your task bar having X(cross) sign, which means that it is disabled.
·         So at last all you have to do is to use the installer of deep freeze and uninstall it. It will restart your pc and you are done.
·         At last all you have to do is thank me. J
Comment if it worked.

Tuesday, November 20, 2012

How to enable to read unsupported fonts or scripts On Operamini


Many of our smart phones don’t support many of the fonts like Nepali. Nowadays we are so used to with social networking sites where people from all over the world share their information in their own language. So it makes us really difficult to read such documents when they are in totally different language than English.
            Most of us use the Opera application in order to surf the internet from our mobile. So this trick or tutorial is related with mobile opera mini.
            In order to make it able to view the Nepali or other unsupported fonts, there is a special feature in opera mini itself that makes it able to read the unsupported fonts or complex scripts. Operamini actually renders the complex scripts on its own server instead of your device.        
            Here is the step by step procedure to activate the feature in opera mini:
  • Firstly open the opera mini browser in your mobile.
  • Now on the address bar type “Config:” without the quotes “”. You may also use “opera:config” instead of “config:”. Both do the same thing.
  • Now from step 2 a new page opens. This is the setting page of the server of Operamini for our device. There you can see many settings, but for this tutorial we are talking about you need to go to the very bottom of the page where you will see a option (Use bitmap fonts for complex scripts). Simply choose yes and save the setting and close the page. This saves our new setting for our device at the opera server.
  • Now next time you open the page with unsupported scripts you will be able to read.